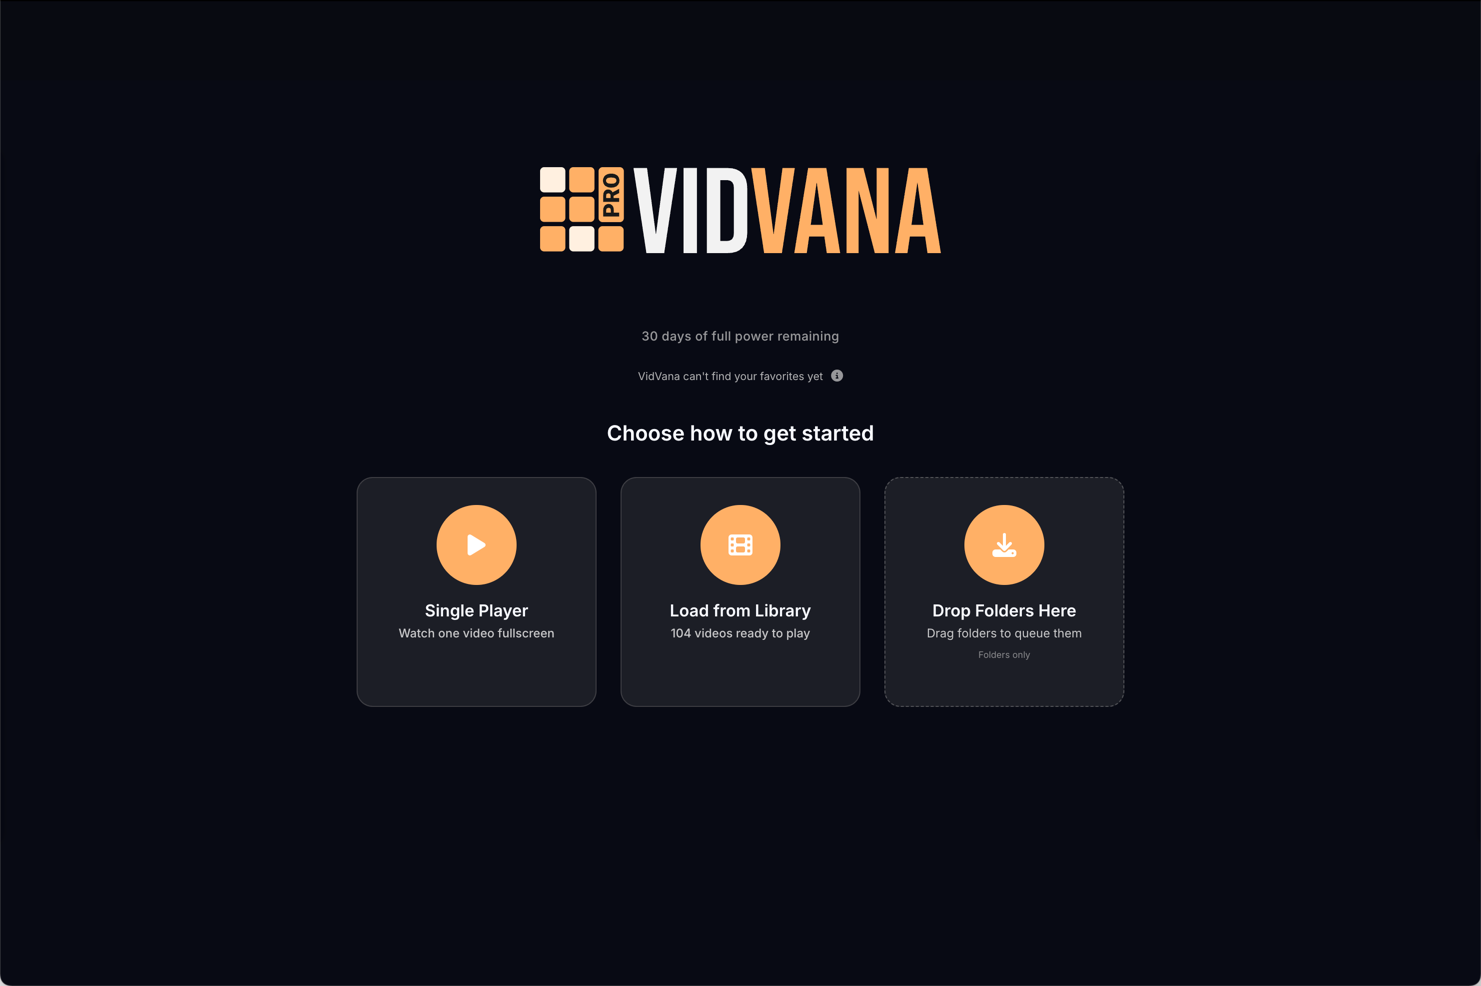
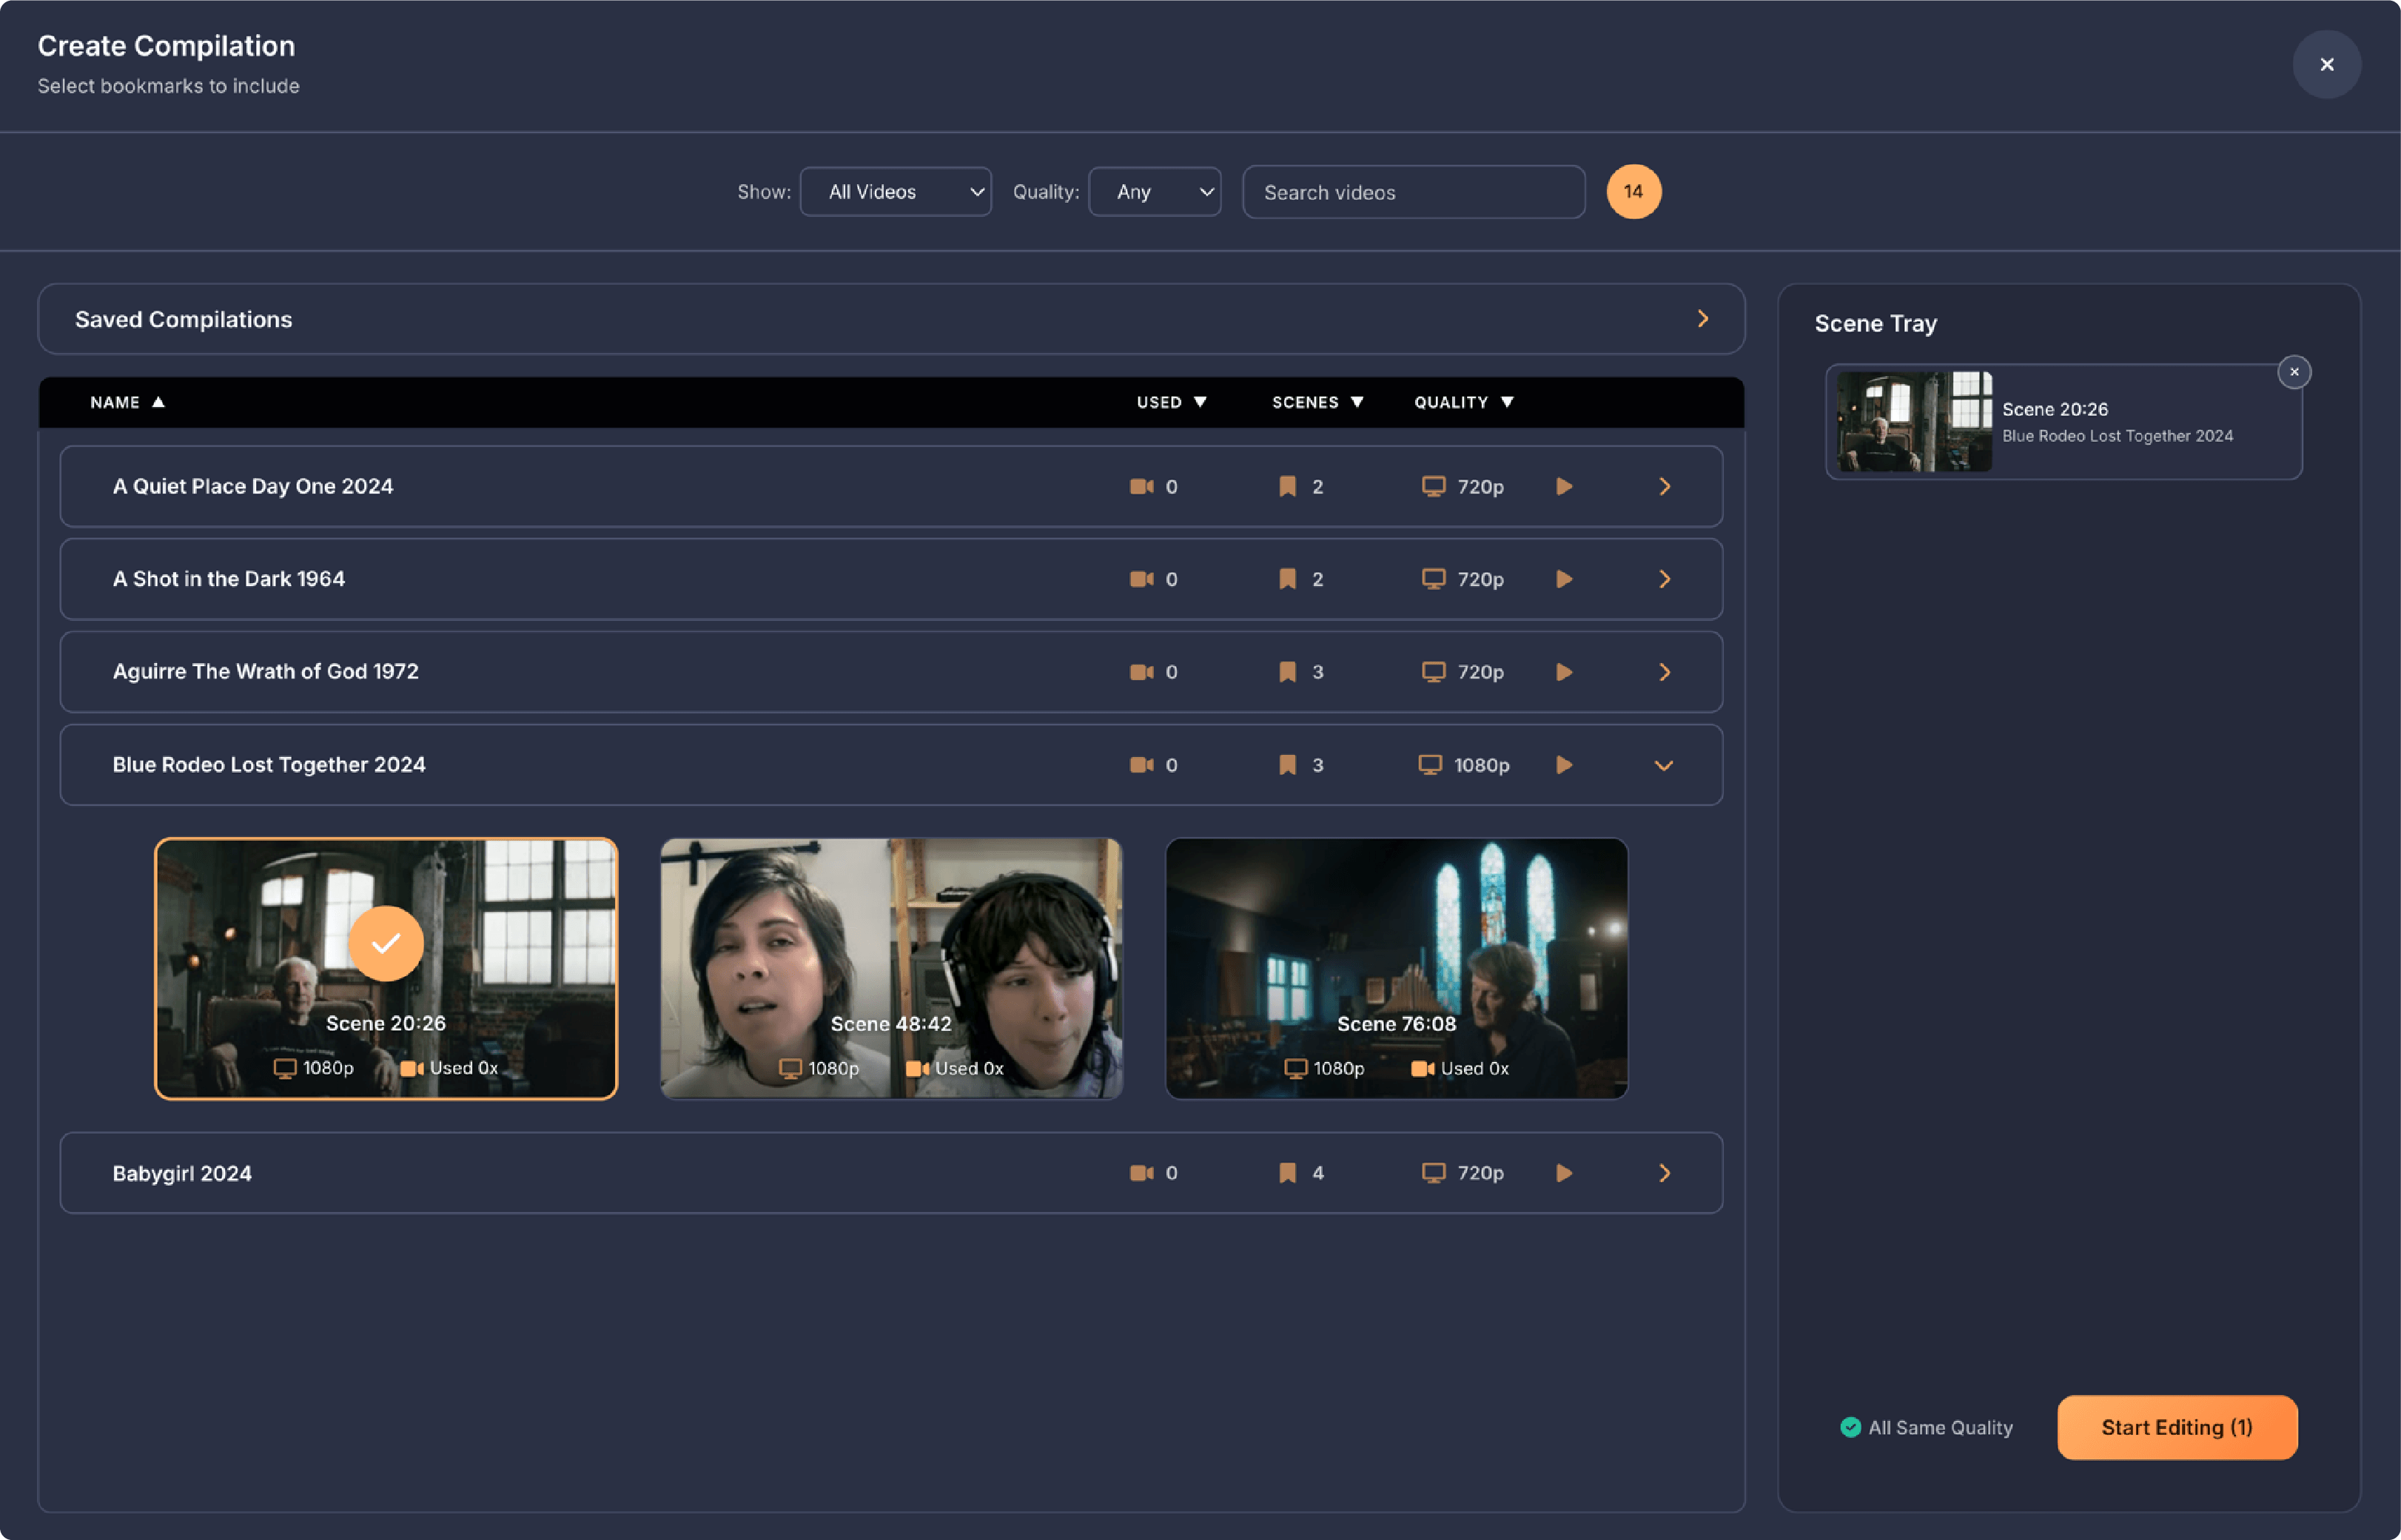
The Create Compilation screen is where you select which bookmarked moments you want to include in your compilation. This screen shows all your bookmarks organized by video on the left, with the Scene Tray on the right where your selected bookmarks collect. At the top are tools to filter and search your bookmarks.
At the top of the screen, you'll see the filter controls. The first dropdown says "Show" and lets you pick between All Videos, Unused Only to see videos that haven't been used in any compilations yet, or Used Only to see videos that have already been used. Next to that is the "Quality" dropdown where you can filter by Any quality, 4K, 1080p, 720p, or SD. To the right is a search box where you can type a video name to instantly filter the results. Included on the row is a number badge showing the total count of bookmarks that match your current filters.
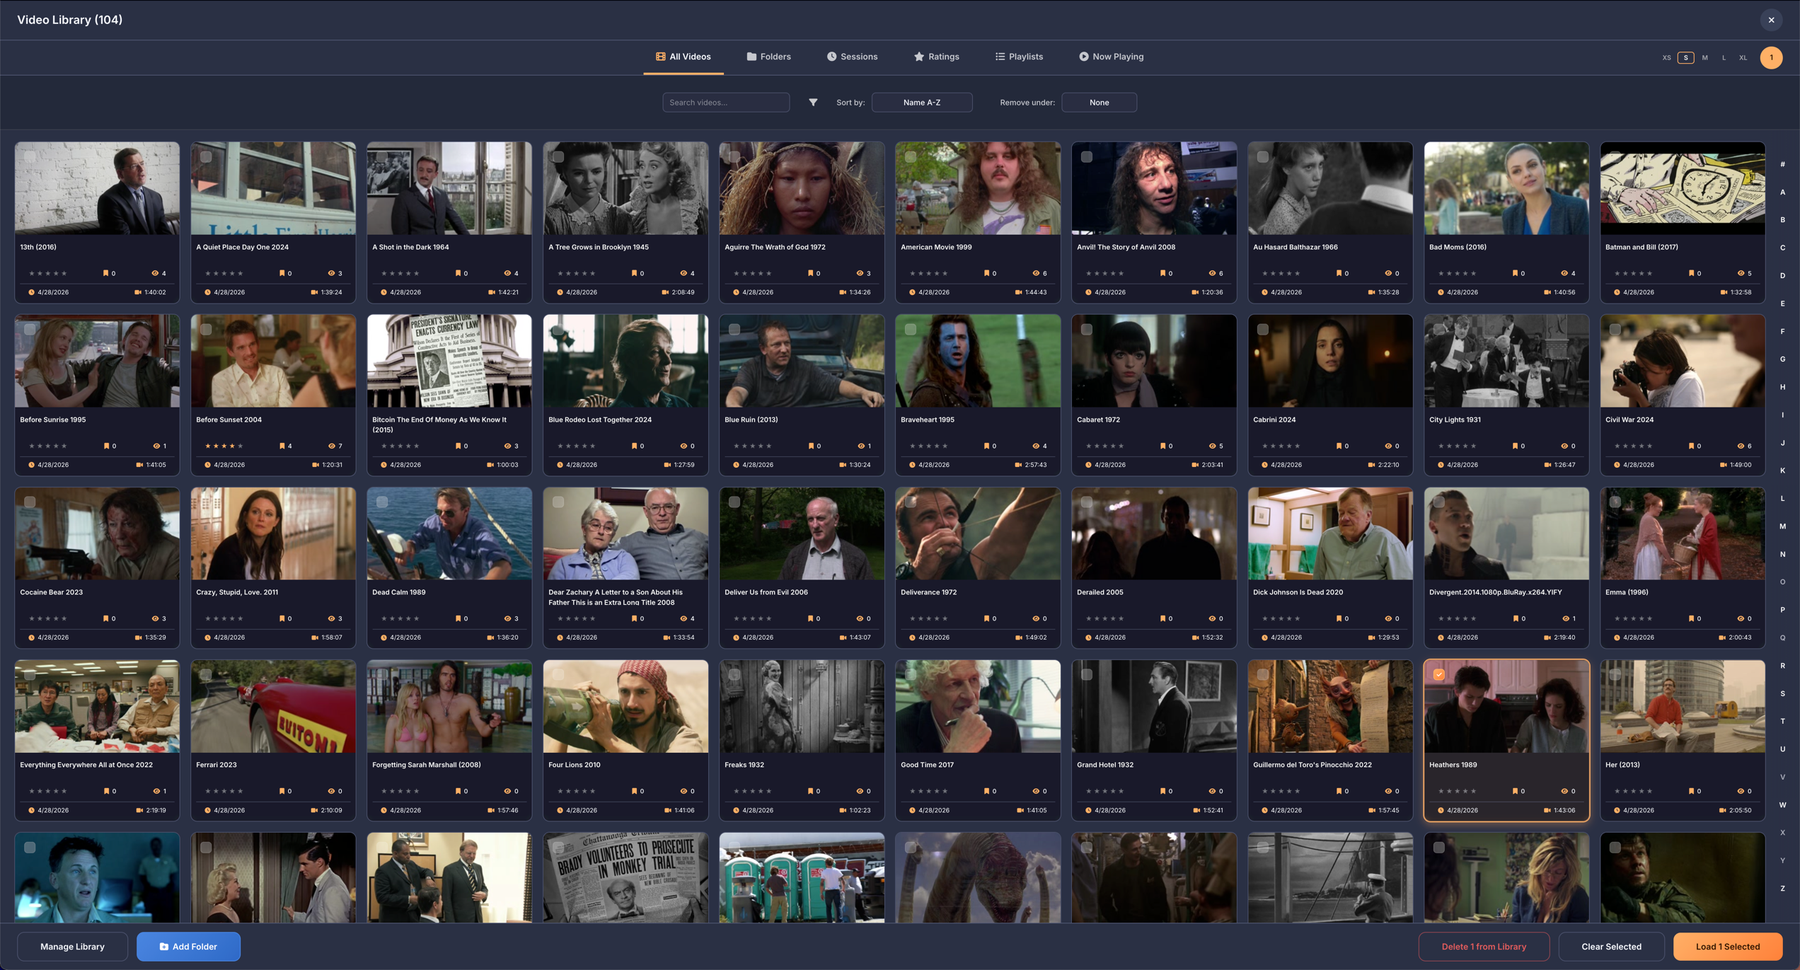
Below the filters on the left side, your bookmarks are displayed as rows organized by video. Each row shows the video name on the left, followed by three columns showing how many times that video has been used in compilations, how many bookmarked scenes it has, and what quality the video is. If a video file is unavailable because it was moved, deleted, or the drive is offline, the row appears dimmed and shows Off for the quality. On the right side of each row are three buttons. The play button opens that video in fullscreen mode so you can add, edit, or remove bookmarks, then returns you to the compilation screen when you exit fullscreen. The X button deletes all bookmarks for that video. The chevron button expands the row to show all the individual bookmarked moments as thumbnail tiles.
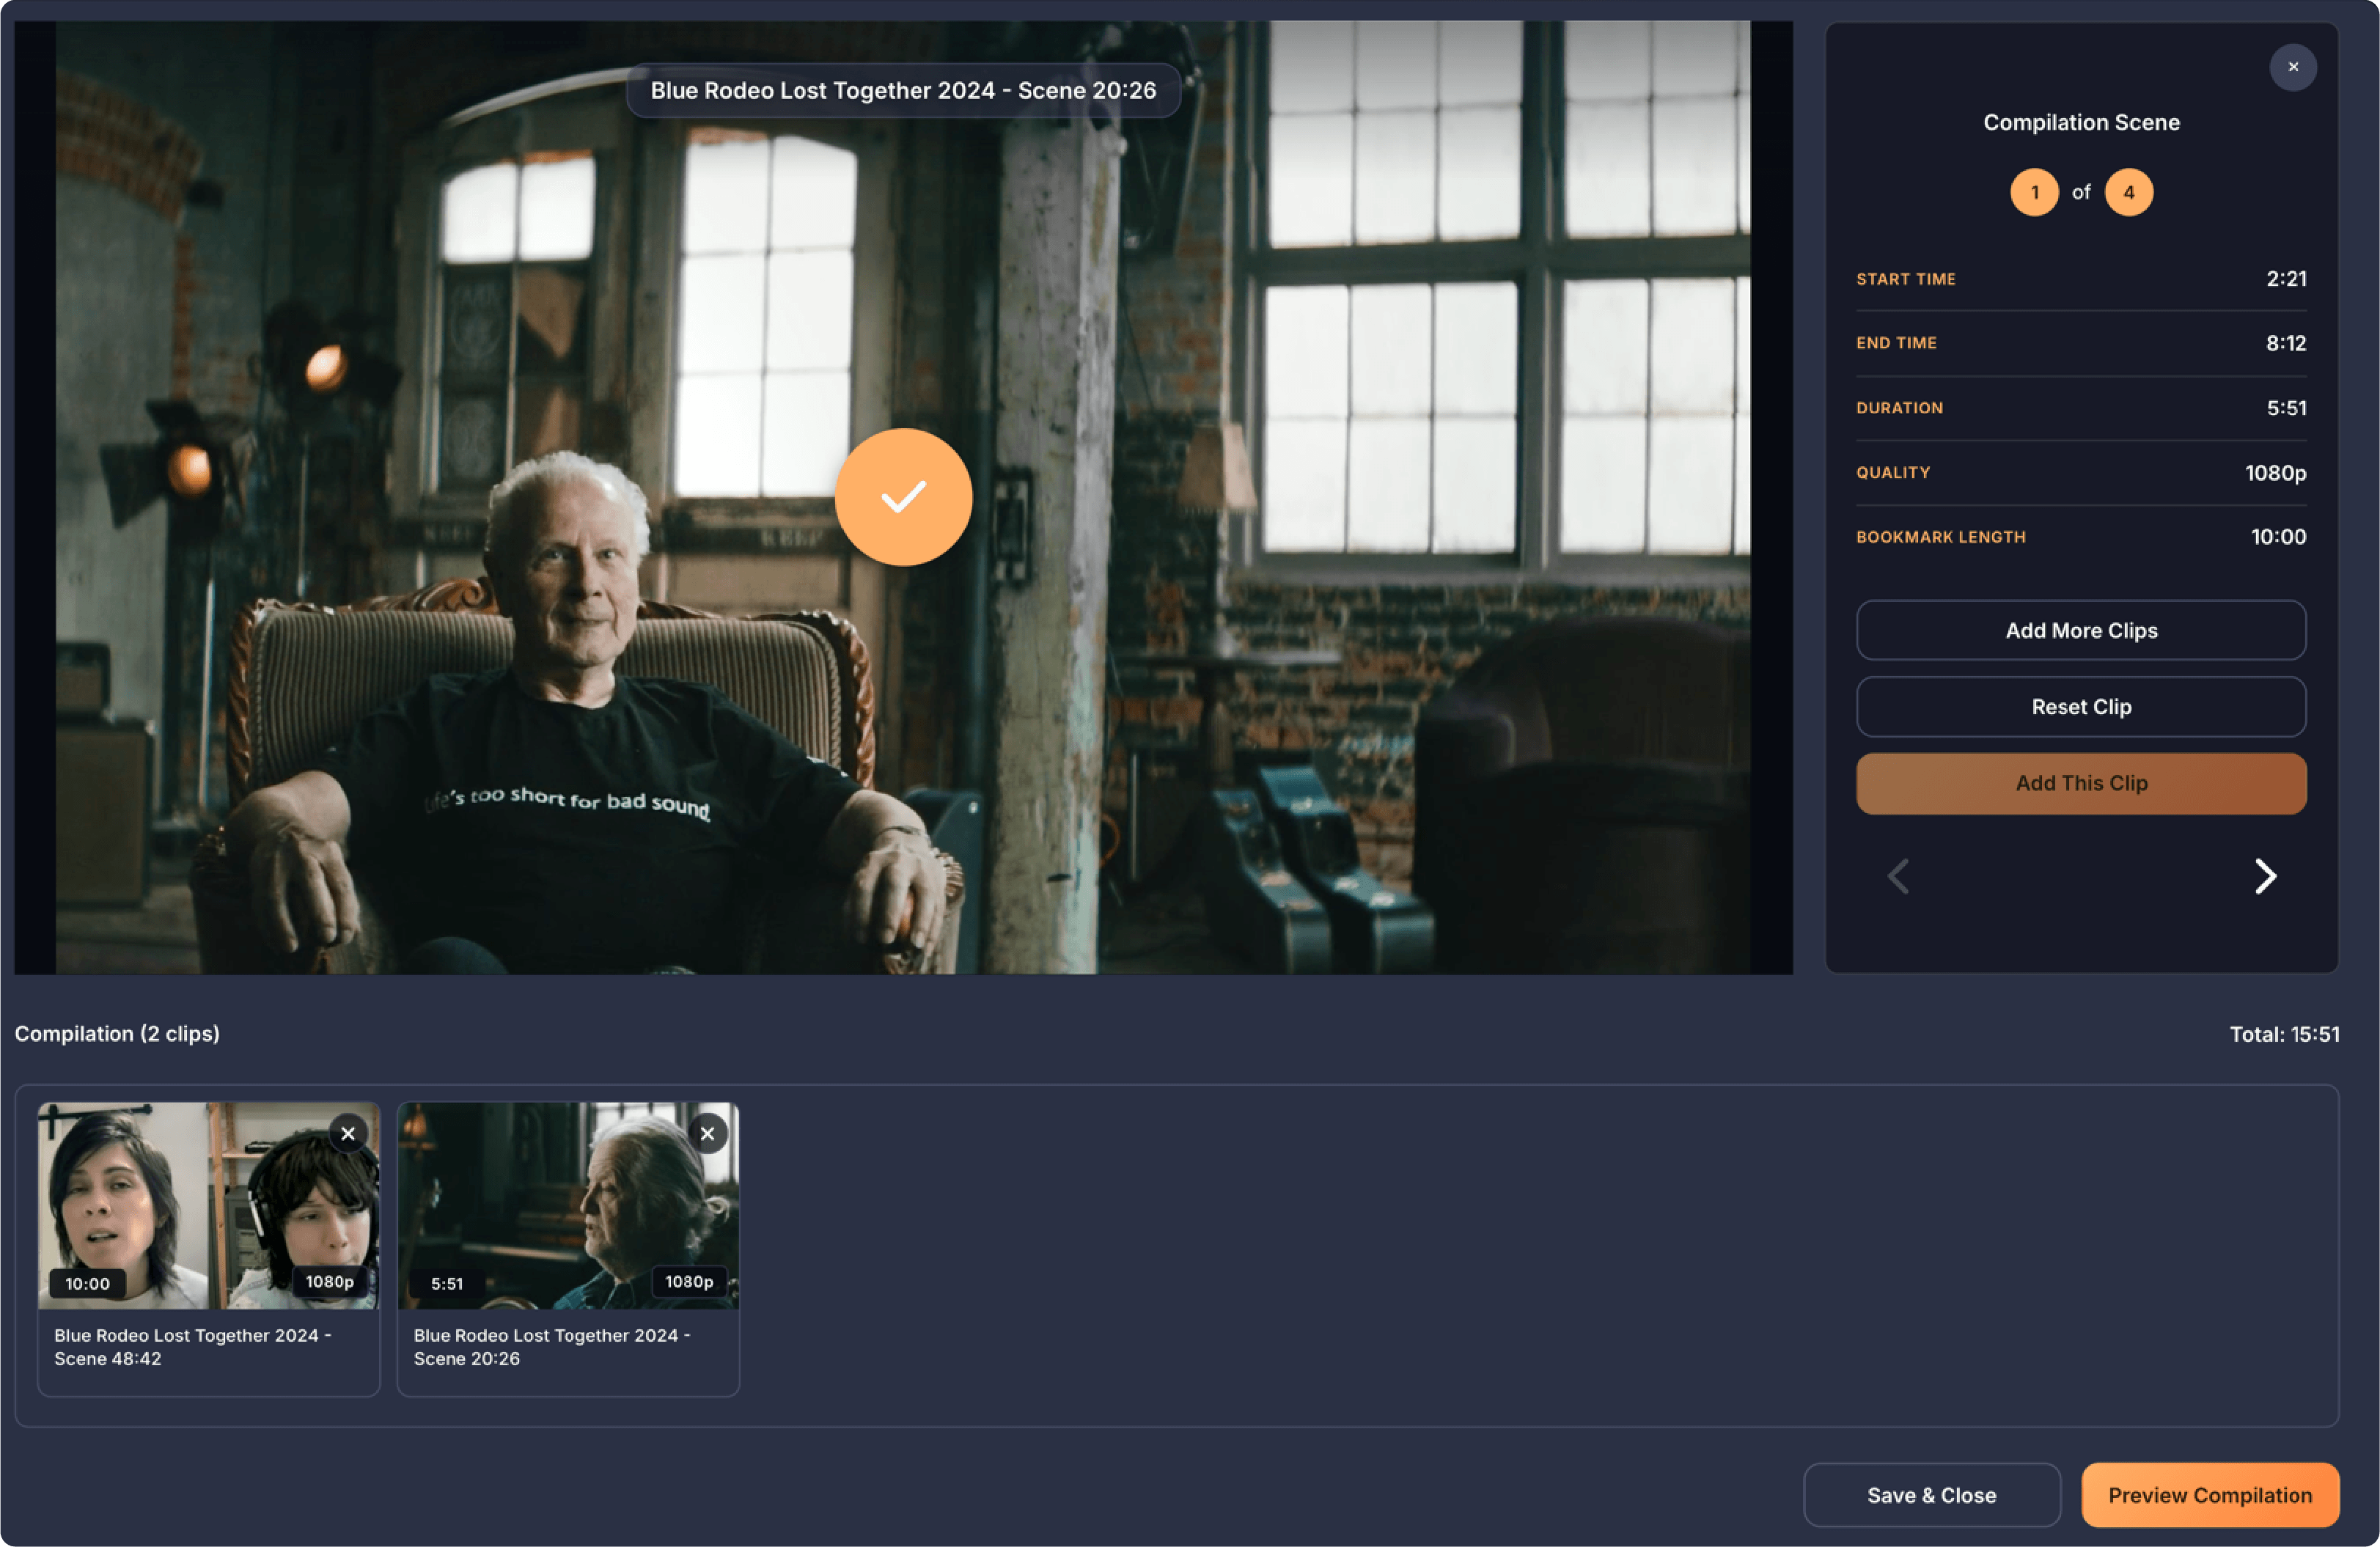
When you click the chevron to expand a row, you'll see thumbnail tiles for each bookmarked moment. Each tile shows a preview image of that moment. Below the thumbnail is the scene timestamp showing where in the video that bookmark is located, the video name, and how many times that specific bookmark has been used in compilations. When you click a tile, it gets selected and added to the scene tray and a checkmark appears on it. You can also drag the bookmark into the Scene Tray. The tile also highlights with an orange border and checkmark to show it's selected. You can click it again to deselect it. On the right side of the screen is the Scene Tray, which shows all your selected bookmarks as small chips with thumbnails, scene timestamps, and video names. Each chip has an X button to remove it from your selection. Below the Scene Tray, a quality status indicator shows whether your selection is compatible across clips. If all your selected bookmarks are the same quality (4K, 1080p, 720p, or SD), it shows a green checkmark with All Same Quality. If you've mixed different video qualities, it shows a yellow warning triangle with Mixed Quality, because your final export will be limited to the lowest quality in your selection. When you select a bookmark that's lower quality than what you already have, a warning banner appears at the top explaining that this will limit your export quality, giving you the option to cancel or continue. You can check a box on the warning to stop seeing it for the rest of your session.
The Start Editing button shows your selection count as soon as you pick at least one bookmark, but you need at least two clips to continue — if you click with only one selected, the app asks you to add another. With two or more selected, Start Editing takes you to the clip editor where you can trim each scene.